Iced v0.12 Tutorial - Asynchronous actions with Commands
In the recent past, I wrote a tutorial covering the basics of creating an app using the Iced library. While this was a good starting point there are several issues that can arise when creating more complex apps. One problem you might notice is that when performing time-consuming or blocking tasks your application freezes unless handled properly, leaving your user a poor experience while using the app.
But there is a solution to this: "Commands". Commands allow you to run actions asynchronously, so you don't have to block the user's interactions. This is useful for HTTP requests, long-running algorithms, IO operations, and other blocking tasks.
In this tutorial, I'll cover how to prevent blocking your app with commands. You'll learn how to create one, and when they're useful. I'll also go over some useful commands that iced already has available:
- Loading font files into your application.
- Copying and pasting from the clipboard.
- Scrolling to a certain offset from a
scrollablewidget.
Prerequisites
Some knowledge of using the Iced library is expected. This time, I won't cover how widgets or messages work. Neither will I explain how to run your application. My beginner tutorial on Iced 0.12 covers all of that in great detail.
Just like in my beginners tutorial, you're also expected to be proficient enough with Rust. Skipping this step might lead to a lot of unnecessary confusion and frustration. So read the Official Rust Book if you aren't comfortable with Rust.
Counting Primes
First, we'll demonstrate the reason why we need asynchronous actions in the first place. We're going to start a new project. We want this project to give us an exhaustive list of every prime number up to the number we pass into the text input.
If you don't care to follow along, just skip to the end of the section where you'll find the complete code.
Note
In case you've forgotten from school, a prime number is a number that can only be exactly divided by any whole number other than itself or 1.
Let's create a new Iced project with the following as the Cargo.toml:
[package]name = "Grocery-List-Application"version = "0.1.0"edition = "2024"
[dependencies]iced = {version = "0.12.1"}
We'll first import all the library items we need from Iced at the top of our main.rs file.
use iced::{widget::{button, column, row, scrollable, text, text_input}, Element, Sandbox, Settings};
We'll create the following struct which holds our main application state:
struct PrimeNumbersApp { result: Vec<usize>, text_value: String}
The attribute result with the value Vec<usize> will be the results of our prime numbers. The other attribute text_value holds the value for our upcoming text_input.
We also need to create the following Message enum to reflect the anticipated user input.
#[derive(Clone, Debug)]enum Message { ButtonPress, TextInputted(String)}
The variants ButtonPress and TextInputted(String) handle the submit button and the text_input widget interactions, respectively.
Now we're going to implement the Sandbox trait into our PrimeNumbersApp struct.
impl Sandbox for PrimeNumbersApp {    type Message = Message;
    fn new() -> Self {        Self {            result: Vec::new(),            text_value: String::new(),        }    }
    fn title(&self) -> String {        String::from("Get all the prime numbers up to the passed number")    }
    fn update(&mut self, message: Self::Message) {        match message {            Message::ButtonPress => {                let number: Result<usize, _> = self.text_value.parse();                if let Ok(number) = number {                    self.result = list_of_primes(number)                }            }            Message::TextInputted(input) => self.text_value = input,        }    }
    fn view(&self) -> Element<'_, Self::Message> {        let text_items: Vec<Element<Message>> = prime_numbers_items(&self.result);        column!(            row!(                button(text("Calculate Primes")).on_press(Message::ButtonPress),                text_input("Numbers only", &self.text_value).on_input(|value| Message::TextInputted(value))            )            .spacing(50)            .padding(50),            scrollable(column(text_items)).width(200)        )        .align_items(iced::Alignment::Center)        .into()    }}
We're doing a lot here, so I'll explain what's going on.
Like in my last tutorial, we're defining the Message our application uses as our previously defined enum also named Message, we have a method new which initializes the state of our application, and we're setting the title of the application to a string with the title method. None of this should be new to you.
In the update method, we're processing the variants of the Message enum, like usual. On ButtonPress if the value passed can be converted into a number, we create a list of prime numbers up to the number passed. We save that value to result.
Finally, in our view method we take the list of prime numbers and pass them into a scrollable widget. We also added a button that sends the ButtonPress message, and a text input sends a TextInputted message.
Now we're only missing a few core functions for everything to work:
fn is_prime(n: usize) -> bool {    if n <= 1 {        return false;    }    for possible_multiple in 2..n {        if n % possible_multiple == 0 {            return false;        }    }    true}
fn list_of_primes(n: usize) -> Vec<usize> {    let mut prime_numbers = Vec::new();    for i in 2..n {        if is_prime(i) {            prime_numbers.push(i);        }    }    prime_numbers}
fn prime_numbers_items(items: &Vec<usize>) -> Vec<Element<Message>> {    let mut element_items: Vec<Element<Message>> = Vec::new();    for i in items {        element_items.push(text(i).into());    }    element_items}
We have an is_prime function which returns true or false depending on whether the passed number is a prime number or not. This function is used by the list_of_primes function, which returns a vector of prime numbers up to the number passed. Lastly, we have the prime_numbers_items function which takes a vector of numbers (presumably prime numbers) and returns a vector of text widgets.
Note
An astute reader might notice that the list_of_primes and is_prime functions can be optimized. Good job noticing! However, finding an optimal algorithm is not the point of this tutorial.
Before we forget, we must add the main function so that we can run this application.
pub fn main() -> iced::Result { PrimeNumbersApp::run(Settings::default())}
With that, we're done! The final result should look like this:
use iced::{    widget::{button, column, row, scrollable, text, text_input},    Element, Sandbox, Settings,};
fn is_prime(n: usize) -> bool {    if n <= 1 {        return false;    }    for possible_multiple in 2..n {        if n % possible_multiple == 0 {            return false;        }    }    true}
fn list_of_primes(n: usize) -> Vec<usize> {    let mut prime_numbers = Vec::new();    for i in 2..n {        if is_prime(i) {            prime_numbers.push(i);        }    }    prime_numbers}
fn prime_numbers_items(items: &Vec<usize>) -> Vec<Element<Message>> {    let mut element_items: Vec<Element<Message>> = Vec::new();    for i in items {        element_items.push(text(i).into());    }    element_items}
struct PrimeNumbersApp {    result: Vec<usize>,    text_value: String,}
#[derive(Clone, Debug)]enum Message {    ButtonPress,    TextInputted(String),}
impl Sandbox for PrimeNumbersApp {    type Message = Message;
    fn new() -> Self {        Self {            result: Vec::new(),            text_value: String::new(),        }    }
    fn title(&self) -> String {        String::from("Get all the prime numbers up to the passed number")    }
    fn update(&mut self, message: Self::Message) {        match message {            Message::ButtonPress => {                let number: Result<usize, _> = self.text_value.parse();                if let Ok(number) = number {                    self.result = list_of_primes(number)                }            }            Message::TextInputted(input) => self.text_value = input,        }    }
    fn view(&self) -> Element<'_, Self::Message> {        let text_items: Vec<Element<Message>> = prime_numbers_items(&self.result);        column!(            row!(                button(text("Calculate Primes")).on_press(Message::ButtonPress),                text_input("Numbers only", &self.text_value).on_input(|value| Message::TextInputted(value))            )            .spacing(50)            .padding(50),            scrollable(column(text_items)).width(200)        )        .align_items(iced::Alignment::Center)        .into()    }}
pub fn main() -> iced::Result {    PrimeNumbersApp::run(Settings::default())}
Your Cargo.toml should be unchanged, but it should look like this:
[package]name = "Grocery-List-Application"version = "0.1.0"edition = "2024"
[dependencies]iced = {version = "0.12.1"}
When you run your app, you should see this when you input the number 100 and click the button:
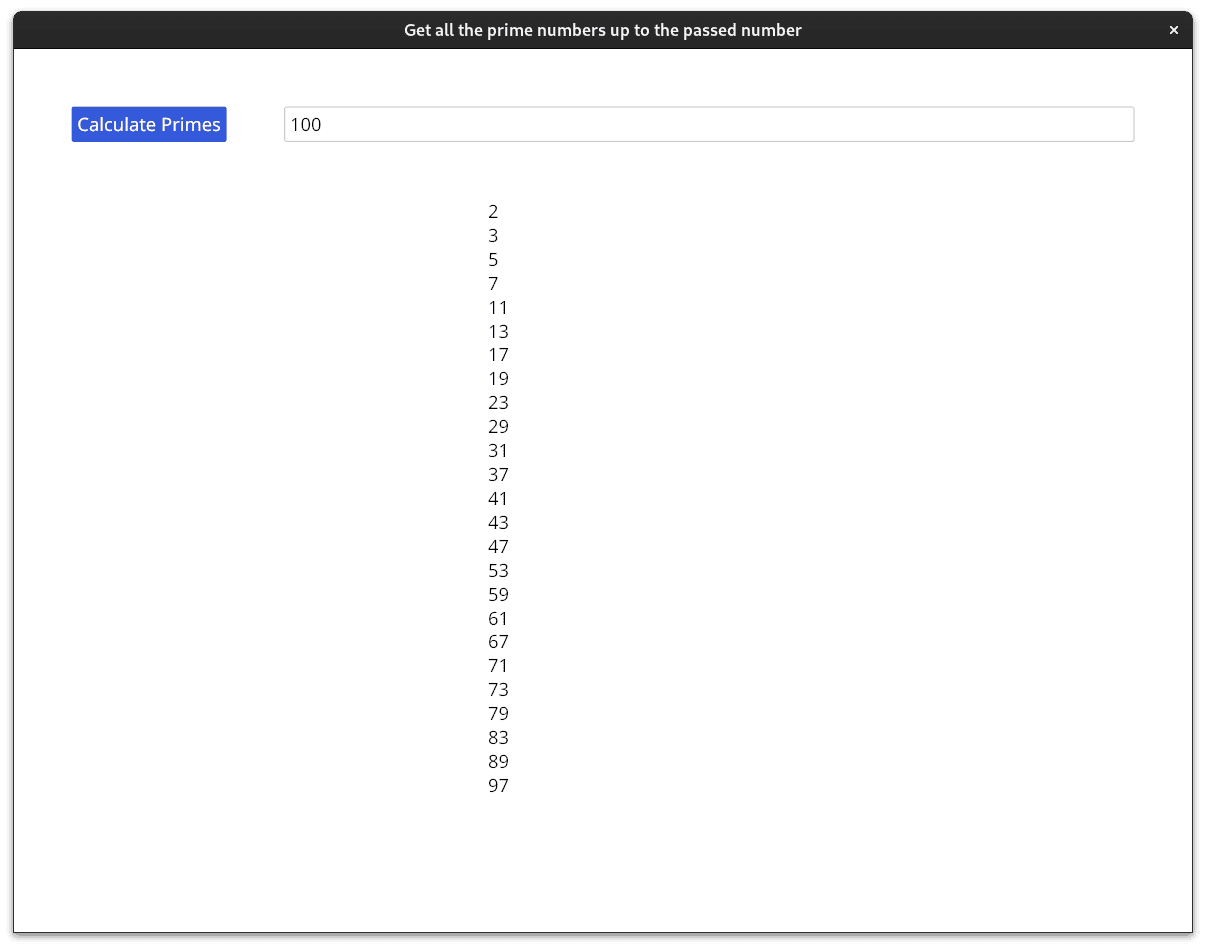
Great our application works well... or does it?
Submit the number a hundred, the application runs fine. The same for a thousand. At ten thousand, you might notice a slight lag. At a hundred-thousand is where you might notice some problems. Our app gets stuck trying to calculate our prime numbers. You'll no longer be able to click on buttons or type in the text input. On my machine, if the program is blocked for long enough, my operating system will report that the app has frozen.
The problem is that our application runs the calculations synchronously, waiting for the result of our calculation of list_of_primes before letting any other updates occur. This gives our users a horrendous user experience. As you might already know, this problem is not unique to long-running algorithms, HTTP requests, reading files: anything that blocks the application will completely freeze the application. Luckily for us, there's a way to run operations asynchronously.
Commands
Asynchronous operations won't block the application while giving us our desired result. In Iced, to run asynchronous tasks, we create a command. This is a core aspect of how Iced works.
Commands are actions that run asynchronously. We can create a custom command that returns a Message, this message can then be used to change the state of our application. Commands are hidden from developers when you use the Sandbox trait, so we'll need to use the Application trait.
Let's modify our main.rs file. Like always, we'll start with our imports.
use iced::{ advanced::graphics::futures::backend::default::Executor, widget::{button, column, row, scrollable, text, text_input}, Application, Element, Settings, Theme, Command};
We're going to add a new variant to our Message enum.
#[derive(Clone, Debug)]enum Message { ButtonPress, TextInputted(String), ListOfPrimes(Vec<usize>),}
ListOfPrimes will contain the list of prime numbers returned from the command we'll create
later.
We're going to remove our implementation of the Sandbox trait and replace it with an implementation of a more robust trait, Application.
impl Application for CommandsMain {    type Message = Message;    type Executor = Executor;    type Theme = Theme;    type Flags = ();
    fn new(_: ()) -> (Self, Command<Message>) {        (            Self {                result: Vec::new(),                text_value: String::new(),            },            Command::none(),        )    }
    fn title(&self) -> String {        String::from("Using commands to calculate prime numbers.")    }
    fn update(&mut self, message: Self::Message) -> Command<Message> {        match message {            Message::ButtonPress => {                let number: Result<usize, _> = self.text_value.parse();                if let Ok(number) = number {                    return Command::perform(                        async move { list_of_primes(number) },                        |value| Message::ListOfPrimes(value),                    );                }                Command::none()            }            Message::TextInputted(input) => {                self.text_value = input;                Command::none()            }            Message::ListOfPrimes(primes) => {                self.result = primes;                Command::none()            }        }    }
    fn view(&self) -> Element<'_, Self::Message> {        let text_items: Vec<Element<Message>> = prime_numbers(&self.result);        column!(            row!(                button(text("Calculate Primes")).on_press(Message::ButtonPress),                text_input("Numbers only", &self.text_value).on_input(Message::TextInputted)            )            .spacing(50)            .padding(50),            scrollable(column(text_items)).width(200)        )        .align_items(iced::Alignment::Center)        .into()    }}
You'll notice that the Application trait is almost identical to the Sandbox trait, although there are a few differences.
At the beginning of our implementation, we define 4 types. Message, Theme, Executor, and Flags. For now, this is not important to us, so we'll ignore this.
The methods title and view are mostly untouched, but our new method has a significant change though. Previously, our method returned Self. It still does, but the method also returns a command. It's so that we can define a command that we might want to run once the application first starts. This will be useful later. Since we don't need to run a command on the app's start time for now, we return Command::none, which is an empty command (one that doesn't do anything).
Our update method has also changed, now it returns a command too. We take advantage of this, in the ButtonPress variant of our message enum, instead of running our list_of_primes function directly, we create a command that runs it asynchronously.
We can create commands by running Command::perform. Command::perform takes two parameters. One is an asynchronous function, this is where we pass our list_of_primes function so that it doesn't block our app, the other parameter is a callback function, it'll take the result of our asynchronous function and return a Message. Just like our button and text_input widgets, this Message will be sent to the update method to be processed. We create a ListOfPrimes message which we use to save the result of the command.
Every variant processed in Message, other than the ButtonPressed, returns Command::none.
The final code should look like this:
use iced::{    advanced::graphics::futures::backend::default::Executor,    widget::{button, column, row, scrollable, text, text_input},    Application, Element, Settings, Theme, Command};
fn is_prime(n: usize) -> bool {    if n <= 1 {        return false;    }    for possible_multiple in 2..n {        if n % possible_multiple == 0 {            return false;        }    }    true}
fn list_of_primes(n: usize) -> Vec<usize> {    let mut prime_numbers = Vec::new();    for i in 2..n {        if is_prime(i) {            prime_numbers.push(i);        }    }    prime_numbers}
fn prime_numbers(items: &Vec<usize>) -> Vec<Element<Message>> {    let mut element_items: Vec<Element<Message>> = Vec::new();    for i in items {        element_items.push(text(i).into());    }    element_items}struct CommandsMain {    result: Vec<usize>,    text_value: String,}
#[derive(Clone, Debug)]enum Message {    ButtonPress,    TextInputted(String),    ListOfPrimes(Vec<usize>),}
impl Application for CommandsMain {    type Message = Message;    type Executor = Executor;    type Theme = Theme;    type Flags = ();
    fn new(_: ()) -> (Self, Command<Message>) {        (            Self {                result: Vec::new(),                text_value: String::new(),            },            Command::none(),        )    }
    fn title(&self) -> String {        String::from("Using commands to calculate prime numbers.")    }
    fn update(&mut self, message: Self::Message) -> Command<Message> {        match message {            Message::ButtonPress => {                let number: Result<usize, _> = self.text_value.parse();                if let Ok(number) = number {                    return Command::perform(                        async move { list_of_primes(number) },                        |value| Message::ListOfPrimes(value),                    );                }                Command::none()            }            Message::TextInputted(input) => {                self.text_value = input;                Command::none()            }            Message::ListOfPrimes(primes) => {                self.result = primes;                Command::none()            }        }    }
    fn view(&self) -> Element<'_, Self::Message> {        let text_items: Vec<Element<Message>> = prime_numbers(&self.result);        column!(            row!(                button(text("Calculate Primes")).on_press(Message::ButtonPress),                text_input("Numbers only", &self.text_value).on_input(Message::TextInputted)            )            .spacing(50)            .padding(50),            scrollable(column(text_items)).width(200)        )        .align_items(iced::Alignment::Center)        .into()    }}
pub fn main() -> iced::Result {    CommandsMain::run(Settings::default())}
If you run the application it'll look exactly the same as before, but you should notice it provides a much better experience. When you pass bigger numbers you can still highlight the button by hovering over it, and you're able to type into the text_input. Great!
In this example, we used a command to run an algorithm in the background. But when you're sending other asynchronous actions, such as HTTP requests, commands are essential. However, regardless of the asynchronous block or function, the process should be the same: Create a command with Command:perform, pass the asynchronous function or block you want to run, and pass the returned value into a message so that it can be saved.
Note
Because in the update method, we can create commands that create messages, it's possible to create an infinite loop of updates and messages. This can be accomplished by create a message which creates a message of the same type. Avoid doing this by accident.
Predefined commands
You know how to create your own commands now, but what about the commands that Iced already provides? I'll give a list of the commands I find most important. Each example is a stand alone project, and I won't dive deeply into every concept of the project, so you aren't expected copy and run each project if you don't want to.
Loading a font
Let's build an application that loads a font, and when a button is pressed, it'll toggle between bold and regular font weight.
Let's say we want to use one of my favorite fonts, the Poppins font, in our application. First, we would download the font and place it in the root of our directory. I set them up like this:
<root_of_project>/fonts/poppins/Poppins-Regular.ttf<root_of_project>fonts/poppins/Poppins-Black.ttf
We can now include these fonts like this:
use iced::{advanced::graphics::futures::backend::default::Executor, font::Family, widget::{button, column, text}, Application, Command, Element, Font, Pixels, Settings, Theme};
struct FontLoadingApp {    state: AppState,    should_be_bold: bool,}
#[derive(Clone, Debug)]enum Message {    FontLoaded( Result<(), iced::font::Error>),    ToggleBold}
enum AppState {    FontLoaded,    Loading,    Error,}
const POPPINS_REGULAR: Font = Font {    family: Family::Name("Poppins"),    weight: iced::font::Weight::Normal,    stretch: iced::font::Stretch::Normal,    style: iced::font::Style::Normal,};
const POPPINS_BOLD: Font = Font {    family: Family::Name("Poppins"),    weight: iced::font::Weight::Bold,    stretch: iced::font::Stretch::Normal,    style: iced::font::Style::Normal,};
impl Application for FontLoadingApp {    type Executor = Executor;    type Message = Message;    type Theme = Theme;    type Flags = ();
    fn new(_: ()) -> (Self, iced::Command<Self::Message>) {
        let poppins_regular = iced::font::load(include_bytes!("../fonts/Poppins/Poppins-Regular.ttf")        .as_slice()).map(Message::FontLoaded);        let poppins_bold = iced::font::load(include_bytes!("../fonts/Poppins/Poppins-Bold.ttf")        .as_slice()).map(Message::FontLoaded);
        let commands = vec![poppins_regular, poppins_bold];
        (Self {state: AppState::Loading, should_be_bold: false}, Command::batch(commands))    }
    fn title(&self) -> String {        String::from("A tutorial on how to use commands")    }
    fn update(&mut self, message: Self::Message) -> iced::Command<Self::Message> {        match message {            Message::FontLoaded(result) => {                match result {                    Ok(_value) => self.state = AppState::FontLoaded,                    Err(_e) => self.state = AppState::Error                }                self.state = AppState::FontLoaded;            }            Message::ToggleBold => {                self.should_be_bold = !self.should_be_bold;            },        }        Command::none()    }
    fn view(&self) -> Element<'_, Self::Message, Self::Theme, iced::Renderer> {        let font = match self.should_be_bold {            true => POPPINS_BOLD,            false => POPPINS_REGULAR        };
        match self.state {            AppState::FontLoaded => {                column!(                    text("Whereas disregard and contempt for human rights have resulted")                    .size(Pixels::from(60))                    .font(font),                    button("Toggle bold").on_press(Message::ToggleBold)                )                .align_items(iced::Alignment::Center)                .into()                },            AppState::Loading => text("Loading").into(),            AppState::Error => text("Error").into(),        }    }    }
pub fn main() -> iced::Result {    FontLoadingApp::run(Settings::default())}
There are a few interesting points in this code.
The first is that we are running a command on startup. In the new method we'll run the font::load command that iced provides. font::load allows you to pass the bytes of the font you want and it'll include this font into the available fonts for Iced.
Another interesting aspect of the new method is instead of returning a single Command we take two commands and create a batch of them. By running Command::batch we can take two commands and merge them into one, this is useful for methods that only allow a single command to be returned (which is all of them).
We also create Font structs, it tells our text widgets which font we want to render. The only difference between the POPPINS_REGULAR and the POPPINS_BOLD fonts is their weight attributes. POPPINS_REGULAR and POPPINS_BOLD have Normal and Bold weights, respectively. It's very important that the family attribute matches the family name of the font that you just loaded. If the family names don't match, Iced will simply render the text with a default font and give no error.
Note
You should find the family name of the font on the site you downloaded. There are also tools like fc-scan to figure out the family name of your font by the font file.
Scroll command
The scrollable widget can be scrolled manually by the user, but there's also a way to scroll to a specific offset with a command. I'll demonstrate that with another example.
use iced::{    advanced::graphics::futures::backend::default::Executor,    widget::{self, button, column, scrollable, scrollable::AbsoluteOffset, text},    Application, Element, Length, Settings, Theme,};
struct Scroll {    items: Vec<String>,}
#[derive(Clone, Debug)]enum Message {    ButtonPress,}
impl Application for Scroll {    type Executor = Executor;
    type Message = Message;
    type Theme = Theme;
    type Flags = ();
    fn new(_: ()) -> (Self, iced::Command<Self::Message>) {        let mut items = Vec::new();        for i in 0..1000 {            items.push(i.to_string())        }        (Self { items }, iced::Command::none())    }
    fn title(&self) -> String {        String::from("A tutorial on how to use commands")    }
    fn update(&mut self, message: Self::Message) -> iced::Command<Self::Message> {        match message {            Message::ButtonPress => iced::widget::scrollable::scroll_to(                widget::scrollable::Id::new("1"),                AbsoluteOffset {                    x: 0.0,                    y: f32::MAX,                },            ),        }    }
    fn view(&self) -> Element<'_, Self::Message, Self::Theme, iced::Renderer> {        let mut widgets: Vec<Element<Message>> = vec![];        for i in &self.items {            widgets.push(                text(i)                    .horizontal_alignment(iced::alignment::Horizontal::Center)                    .width(Length::Fill)                    .into(),            );        }        column!(            button("Scroll").on_press(Message::ButtonPress),            scrollable(column(widgets))                .id(scrollable::Id::new("1"))                .width(Length::Fill)        )        .align_items(iced::Alignment::Center)        .into()    }}
pub fn main() -> iced::Result {    Scroll::run(Settings::default())}
Unlike in previous usages of the scrollable widget, we call the method id which accepts an Id. This informs the Iced library which scrollable widget we are referring to when we call the method widget::scrollable::scroll_to.
We call the widget::scrollable::scroll_to in the update method. When the user presses the button, we can scroll the scrollable widget by setting the offset to whatever we want. Here we set the offset to the highest possible number f32 can handle so that we always scroll to the bottom.
Copy and Pasting
Iced allows you to copy selected text and paste while using text_input. But what if you want full access to the clipboard? There are commands that allow you to do this.
use iced::{    advanced::graphics::futures::backend::default::Executor,    widget::{button, row, text_input},    Application, Command, Element, Settings, Theme,};// use rfd;
struct CopyPaste {    input_value: String,}
#[derive(Clone, Debug)]enum Message {    Cut,    Paste,    TextInputted(String),}
impl Application for CopyPaste {    type Executor = Executor;
    type Message = Message;
    type Theme = Theme;
    type Flags = ();
    fn new(_: ()) -> (Self, iced::Command<Self::Message>) {        (            Self {                input_value: String::new(),            },            iced::Command::none(),        )    }
    fn title(&self) -> String {        String::from("A tutorial on how to use commands")    }
    fn update(&mut self, message: Self::Message) -> iced::Command<Self::Message> {        match message {            Message::Cut => {                let command = iced::clipboard::write::<Message>(self.input_value.clone());                self.input_value = String::new();                command            }            Message::Paste => iced::clipboard::read(|value| {                if let Some(value) = value {                    Message::TextInputted(value)                } else {                    Message::TextInputted(String::new())                }            }),            Message::TextInputted(value) => {                self.input_value = value;                Command::none()            }        }    }
    fn view(&self) -> Element<'_, Self::Message, Self::Theme, iced::Renderer> {        row!(            text_input("", &self.input_value).on_input(|value| Message::TextInputted(value)),            button("Cut").on_press(Message::Cut),            button("Paste").on_press(Message::Paste)        )        .spacing(10)        .padding(50)        .into()    }}
pub fn main() -> iced::Result {    CopyPaste::run(Settings::default())}
Here we have the copy and paste controlled by the user's buttons. We copy the text inside the text_input and clear the text input when the "Cut" button is pressed, and we paste whatever text is in the clipboard with the "Paste" button.
The update method is the main point of interest in this example. When the Cut variant of the Message enum is received, we create and use a command to write and replace the value in the clipboard. With the clipboard::write function, we pass in a string to be inside the clipboard. In this instance, we use the string that was in our text_input.
To paste the text into our input, we run the clipboard::read function that also returns a command. We pass into the clipboard::read a callback that contains the string of the clipboard and returns our desired message when the paste action is performed. We make use of the Message variant TextInputted which is used by the text_input to also paste the current value from the clipboard.
Final notes
Commands are a good way to allow you to handle asynchronous events caused by the user, but what about a constant stream of events? Whether the event happens in regular intervals or a less predictable manner, you would need to use the Iced library "subscription". This allows you to create commands and messages based on a stream of events for instance: web sockets or time intervals. Eventually, I plan to also cover subscriptions. Let me know if subscriptions are a particular point of interest for you on my socials.
I decided to cover the commands I found most useful in my projects, if there are any commands that you want to know more about, contact me on my socials and I'll update this tutorial.